User documentation
Adventures should join the early adopters chat and get free credits there to enjoy the platform longer.
Pass by the chat for whatever bug, troubleshoot or particular request.
Log in/ Sign up 🔑
Here everything is done from the terminal
with the much suited authentication mechanism ssh.
Consequently, a single cryptographic key pair is the only thing you need to register and log in.
Log into your account.
-
Generate a fresh new key pair from your computer,
-
Append this host to your ssh configuration at
~/.ssh/config, plus some mandatory environment variables.# ~/.ssh/config # Mandatory KYC Env :( # FIRSTNAME="John" # LASTNAME="Doe" # EMAIL="john@d.oe" # PHONE="+0000000000" # Optional Config Env :) # KbdLayout="qwerty" # qwerty | colemakNotice that environment variables must all be set over a single line after the SetEnv option. -
Connect to the remote dashboard (TUI over ssh),
# "-6" option can be removed if persisted in ~/.ssh/config as "AddressFamily inet6".
Access your VMs.
-
First, add your VM to the list of known hostnames for convenient name resolution.
# /etc/hostnames # vm ipv6 vm name -
Append this generic configuration to
~/.ssh/config.# ~/.ssh/config -
Connect to your fresh VM.
Deploy your services! 🚀
A minimal base configuration.
For your VM to be compatibile with the hypervisor, you need the
nixos-generators module
from the
virshle
flake as a dependency to your configuration:
- Add the virshle an the pipelight flake to your flake inputs.
# flake.nix
{
  inputs =  {
    virshle = {
      url = "github:pipelight/virshle";
      inputs.nixpkgs.follows = "nixpkgs";
    };
    pipelight.url = "github:pipelight/pipelight";
  };
}
- And import the nixos-generators module.
# vm.nix
{
  inputs,
  ...
}: {
  imports = [
    inputs.virshle.nixosModules.nixos-generators
  ];
}
Or, you can just start fresh from the template flake:
Use the remote build.
It is recommanded to build your generations locally and send them to your VM.
With commands like the following:
# with the default cli
# with deploy-rs (magicRollback)
Server specifications.
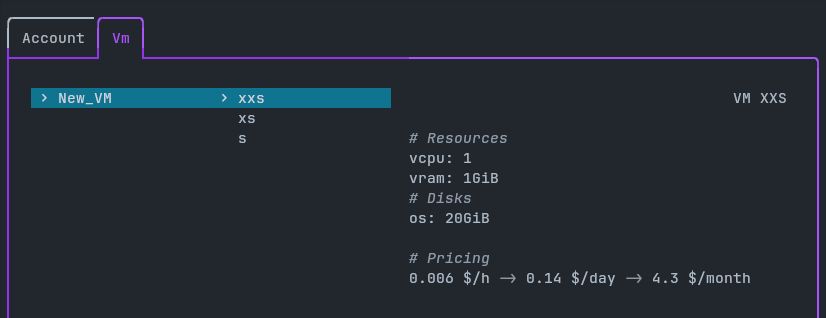
VM Sizes and pricing.
Prices are submitted to change as the software is getting stable. These are the alpha release prices.
| Size | vCPUs | vRam | Storage | $/month | $/day | $/hour | Status | Available |
|---|---|---|---|---|---|---|---|---|
| xxs | 1 | 1 GiB | 20 GiB | $4.3 | $0.14 | $0.006 | Alpha | Now |
| xs | 1 | 2 GiB | 50 GiB | $6.5 | $0.21 | $0.009 | Alpha | Now |
| s | 2 | 4 GiB | 80 GiB | $10 | $0.34 | $0.014 | Alpha | Now |
| m | 4 | 8 GiB | Later | |||||
| l | 6 | 12 GiB | Later |
Storage speed.
Host servers runs on SSDs with reading speed up to 550MB/s (≃ 520 MiB/s) and at least a RAID10 array for VM storage redundancy.
We want them machines as fast as possible.
Unmetered network connectivity.
Every virtual machine has an unmetered network connection that goes from 10 Mb/s (≃1.2 MiB/s) when traffic congestion is maximal up to 1 Gb/s (≃120 MiB/s).
Server location.
I take extreme care at:
- building my own servers,
- slapping the software on it,
- enforcing encryption and privacy by default,
- and plugging them into Data Center where I know the stack and the people,
because I highly distrust third parties concerning hardware, software and network.
It is indeed common knowledge that it is impossible to create an incorruptible virtual machine, especially if it's not your hardware. This doesn't mean it can't be tried, and I've found this enterprise to be the most exciting.
I am not a reseller and have at heart to master the every layers my services are based upon.
But rest assured, more locations will be available.
Dashboard usage.
Once you connect to the ssh server at crocuda.com,
a TUI (terminal user interface) is served right into your terminal emulator.
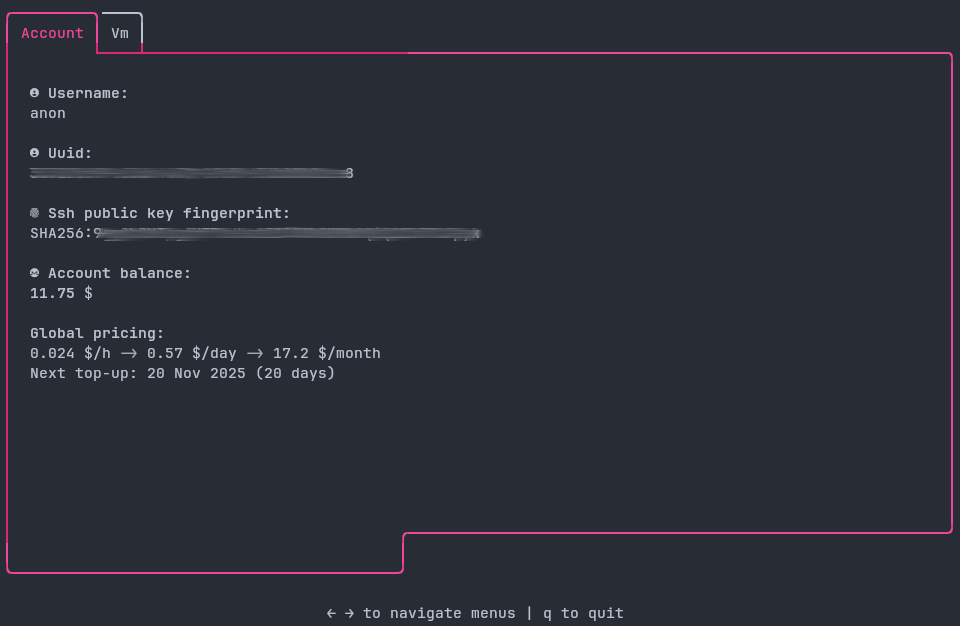
My Account.
The Account tab displays information about your account.
This tab will later contain the menus that will allow you to top up your account.
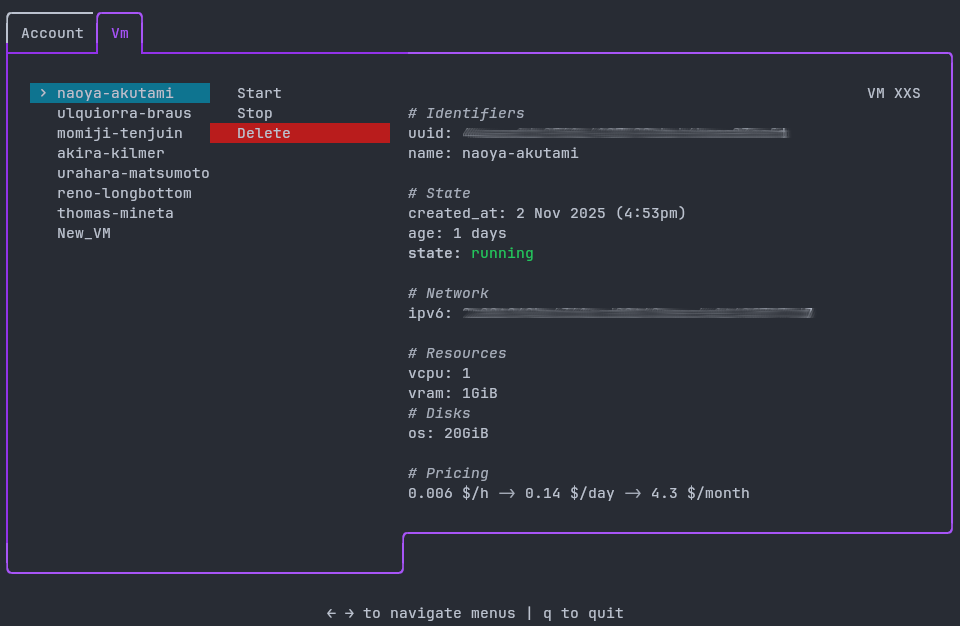
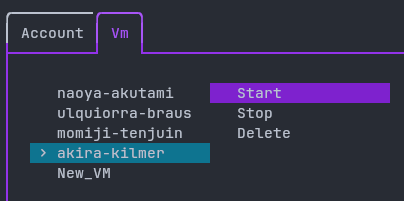
Vm management.
The Vm tab displays information about your VMs and exposes trivial operations:
- create,
- start or restart,
- stop,
- and delete.
And some more to come.
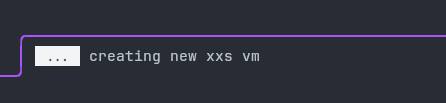
🐣 Create a new VM
You first have to create a new VM from the available templates. Select a size and press Enter.
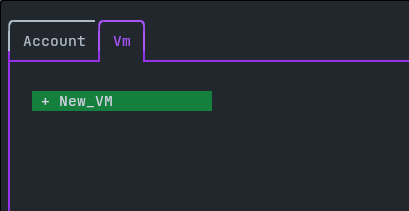
You'll have to wait a few seconds until your VM is delivered.
▶️ Start and Restart (=Reboot)
Staring the VM when it is already running restarts the VM.
⏹️ Stop (=Shutdown)
Stopping a VM, do not stop the billing. You have to delete the VM if you want to stop being billed.
❌ Delete
The notifications area.
You can keep an eye on every VM operation advancement in the bottom right notification area.
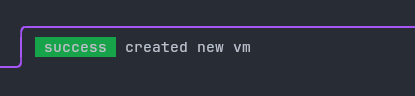
Operations should not take longer than 5 seconds.
Menu keyboard navigation.
The application flow is based on directions, like a lot of TUI file managers (yazi, ranger...) and thus should feel very familiar.
-
Q or Ctrl+C to quit.
-
Tab/Tab+Shift to change tab.
-
Left/h and Right/l to navigate menus and submenus.
-
Up/j and Down/k to change selection.
-
Enter to validate.
Set the environment variable to your favourite keyboard layout to enjoy vim bindings.
- KbdLayout="colemak" -> Left/m, Up/n, Down/e, Right/i
- KbdLayout="dvorak" -> Left/h, Up/t, Down/n, Right/s
Optional: Dangerous operation safeguard.
To avoid any involuntary operations on VMs, you can activate the lock navigation guard.
Add the required environment variable to your ssh configuration.
# ~/.ssh/config
You won't encounter any confirmation prompt after pressing Enter, but rather you will be required to lock the selection beforehand:
-
Press Right to open the submenu and browse through its subitems.
-
Press Right another time to
lock your selection,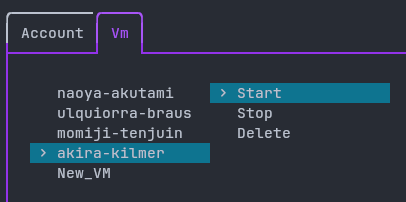
-
Then only can you press Enter to
trigger the operation. -
Press Left or Esc to go back (unlock the selection and close the submenu).
Payment methods
Join the early adopters chat to get free credits.
Monero is the encouraged payment method here, because it is the most privacy respecting cryptocurrency. However Bitcoin, Etherum, Solana, USDC and USDT are also accepted.